If you’re running a manufacturing shop that relies on induction quenching and tempering lines to make parts that hold up under stress—say, automotive gears, shafts, or industrial fasteners—you know how frustrating it can be when those parts come out too soft, too brittle, or inconsistent from batch to batch. As someone who’s supplied induction quenching and tempering production lines for over a decade, I’ve talked to hundreds of guys on the shop floor who’d rather skip a lunch break than rework a whole load of parts because of shoddy processing. The good news is, boosting product quality here isn’t just about buying the shiniest, most expensive equipment—it’s nailing the small, specific tweaks that most people overlook. Let’s break down what actually moves the needle, straight from the folks who live this every day. Induction Quenching and Tempering Production Line
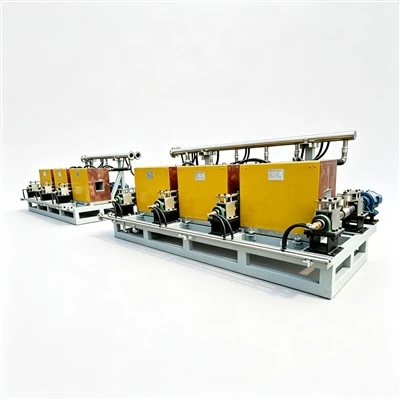
First off, let’s get one thing straight: induction quenching and tempering isn’t a “set it and forget it” process. I see so many operators plug in a recipe on their line’s HMI, walk away, and don’t touch it for weeks. That’s where the first big quality gap starts. Most induction lines run on heat input, time, and power density—but those numbers aren’t one-size-fits-all. Take a gear shaft, for example: the part that needs hardening might be a 5mm wide spline, but a 10mm section further down just needs mild stress relief. If you use a single power setting for the whole shaft, the narrow spline might get overheated (leading to warping) and the thick section might not get hard enough. That mismatch alone can cause 15-20% of a batch to fail later on.
So, what’s the fix here? Move away from static, pre-programmed recipes. Modern induction lines have the tech to adjust power on the fly, but you have to use it. We retrofit a lot of older lines to add real-time thermal profiling—sensors that track surface temperature as the part moves through the inductor. If the sensor picks up that the spline is hitting 900°C (way above the austenitization temp you want), the line dials back power 10% for that section, no operator input needed. For tempering, which is usually a separate oven or even an induction tempering coil, the same logic applies: you don’t heat the whole part to the same temp. A small fastener might only need 180°C tempering to boost toughness, while a heavy axle needs 220°C. Tweaking those zone-specific settings for every part number, instead of using a generic “fastener” setting, cuts part failure rates by a ton. I remember a customer who was running 12% reworks on their connecting rods after switching to this zone-adjusted approach—they dropped that to 2% in a month.
Next up, the stuff that happens before the part even hits the line. You can have a top-tier induction line, but if the raw material is garbage, you’re wasting your time. Wait, not “garbage”—just inconsistent. Induction processing works by heating the surface of the part quickly, which means the microstructure of the raw steel directly affects how the hardening goes. If a batch of steel has uneven grain size, or too much leftover carbon from the mill, some parts will harden faster than others. I’ve seen operators blame the line for bad parts when it was actually the steel coming off the loading conveyor.
The fix here doesn’t have to mean upgrading to $1000/ton steel (though that works if you can swing it). It’s adding a simple pre-processing check step: we usually suggest a portable hardness tester at the input of the line to spot-check every 50 parts. If a steel batch comes in with an average hardness of 20 HRC instead of the required 18 HRC, you can adjust the induction heat time to compensate. Also, clean the parts before they go through induction. Oil, rust, or mill scale on the surface acts as an insulator, so the induction coil can’t heat the steel evenly. A lot of lines skip the pre-cleaner to save time, but that’s a short-term win that costs way more in rework. One of our clients added a $500 vibratory deburr and degreaser to their line’s front end, and their quench crack rate dropped 80% within three months. That’s not a typo—small prep, big payoff.
Then there’s the quenching step, which is where most quality issues live or die. Quenching is when you blast the hot steel with water (or polymer, or oil) to freeze the hardened microstructure in place. If your quench spray is uneven, you get soft spots on the part. I’ve worked with lines that have quench nozzles clogged with scale or old quench fluid, so half the spray is mist and the other half is a concentrated jet. That leads to parts that are soft on one side and warped because of uneven cooling. How do you fix that? First, flush the quench system weekly—no exceptions. We include a maintenance schedule with every line we sell, but most guys toss it in a drawer. Clogged nozzles are such a easy fix, and they cause so many avoidable problems.
Second, pay attention to quench fluid concentration. A lot of shops just top off the water when it’s low, but if you’re using polymer quenchants (which are way better for reducing warping than plain water), the concentration drops over time. Too low, and you get too fast cooling; too high, and cooling is too slow, so hardness is off. We recommend a simple refractometer to check concentration every two shifts—costs $100, saves thousands in bad parts. I had a customer a few years back who was running 10% warp on their ball bearings; we helped them adjust their quench concentration, and warp went under 1% immediately. That’s the kind of win that makes the whole industry click.
Don’t sleep on operator training, either. I know, I know—training feels like a hassle, and your shop floor guys are busy. But here’s the thing: an operator who knows how to read the line’s thermal data, instead of just hitting “start batch,” can spot a problem in 10 parts instead of 100. We offer on-site training for every line we supply, but so many companies skip it, or just do a 15-minute walkthrough on the first day. Good operators know that if a part’s surface temperature is spiking mid-process, that’s a sign the inductor coil is worn out—before the first bad part comes out. Worn inductor coils are another big one: if the copper windings get pitted or dirty, the power transfer drops, so the part doesn’t heat evenly. A quick visual check of the coil every week, or a conductivity test, can save you from a whole batch of soft parts. We tell clients to replace coils every 1-2 years, depending on how heavy their use is, but I still see shops running coils for 5 years past that point—just waiting for quality issues to pop up.
Wait, let’s talk about data, too. Your induction line generates a ton of numbers—power output, temperature, part speed, quench flow. Most shops store that data for a week, then delete it. But if you track that data batch by batch, you can spot trends. Like, every time the line runs part number 102, quench pressure drops below 15 PSI, and hardness is off. That’s a pattern you can fix, instead of guessing after every bad batch. We integrate line data with basic cloud storage for clients who want it, so they can pull up a month’s worth of runs and see exactly when a tweak to power or speed fixed a quality issue. It’s not rocket science, but it’s way more than most shops do.
Let me wrap this up with a real example that’s not just theory. A few months back, a small automotive parts shop was having trouble with their crankshafts—they were failing a fatigue test 8% of the time, which was eating into their profits. They had a 10-year-old induction line from another supplier, and they thought they needed a whole new line. Instead, we walked them through a few tweaks: first, added real-time thermal sensors on the crank’s fillet (the part that usually fails), adjusted power so that section got 5% more heat than the rest. We had them install a refractometer for their polymer quench, and set up a weekly nozzle flush. Then, we did a 2-hour training session with their lead operator to show him how to track the thermal data. Within a month, their failure rate dropped to 1.5%. They didn’t need a new line—they just needed to use the one they had correctly.
At the end of the day, improving induction-quenched product quality isn’t about overspending on fancy gear. It’s about nailing the details: zone-specific processing, prepping raw parts, maintaining your quench system, training your crew, and using the data you already have. If you’re dealing with consistent quality issues on your line, or you’re looking to upgrade your induction quenching and tempering setup to get tighter, more reliable parts, don’t guess—reach out. We work with shops of all sizes, from small job shops to big auto manufacturers, to tailor lines and tweaks that fit your specific parts and goals. No one-size-fits-all nonsense, just straight talk that works on the shop floor.
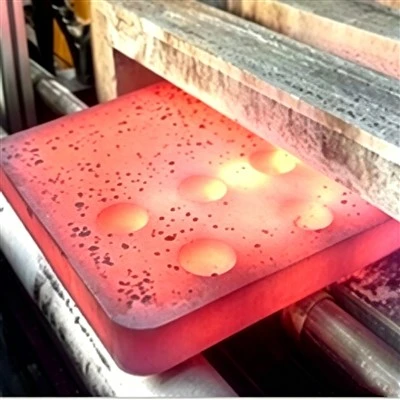
Don’t let avoidable rework or failed parts eat into your margins. Let’s chat about how we can adjust your existing line or set up a new one that keeps your quality high and your downtime low.
Induction Heating Power Supply References:
- ASM International. Induction Heating and Heat Treatment. ASM Handbook, Volume 4, 2020.
- The Induction Heating Society. Best Practices for Induction Quenching Process Control, 2022.
- Manufacturing Engineering Magazine. Reducing Warping in Induction-Quenched Steel Parts, 2021.
Hebei Yuantuo Electromechanical Equipment Manufacturing Co., Ltd.
As one of the most professional manufacturers and suppliers of induction quenching and tempering production line in China, our products have good reputation in the market. Please rest assured to buy advanced equipment made in China here and get quotation from our factory. Customized orders are welcome.
Address: Yanshan Street West and Jialingjiang Road North, Economic and Technological Development Zone, Wuqiao County, Cangzhou City, Hebei Province, China
E-mail: yuantuotech01@gmail.com
WebSite: https://www.yuantuoem.com/
